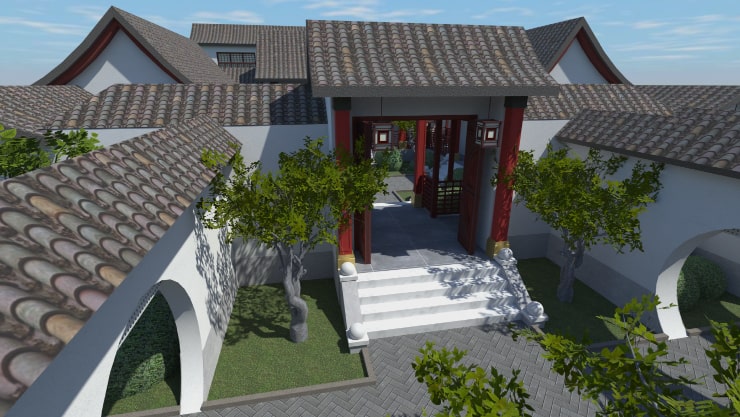
About Siheyuan
The name of the building represents its structure: si means “four,” he is a conjunction, and yuan means “yard.” Altogether, the term siheyuan stands for the complex of four buildings with their facades facing a shared yard. These buildings are usually situated along the north-south and west-east axes.
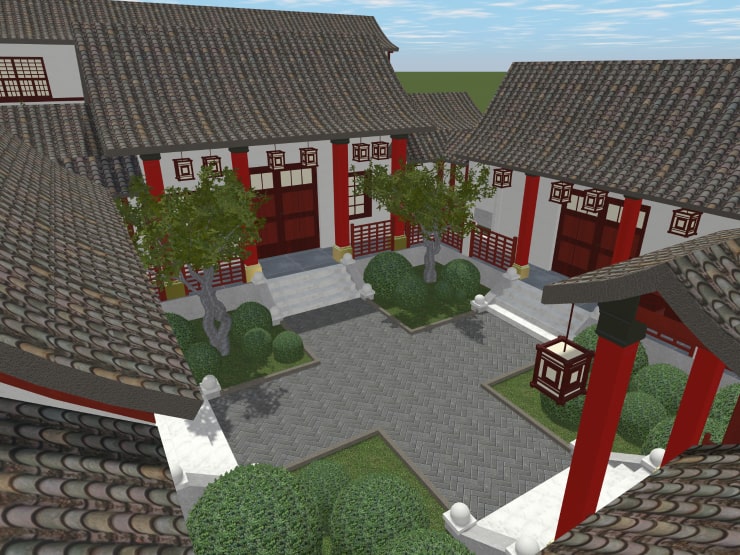
The first siheyuan houses appeared during Western Zhou rule (1045 BC-771 BC). This term is often described as a larger group of buildings. Besides zhengfang (厢房)—the main and the tallest building, which housed the head of the family—and erfang (耳房)—additional buildings that served as storerooms, this group of buildings also consisted of xiangfang (厢房)—side houses for married sons, inner gates called ermen/chuihuamen (二门/垂花门), main gates called damen (大门) with lodge and staff housing—daozuofang (倒座房) and the rear house called houzhaofang (后罩房)—a building that was designed for unmarried daughters, female staff and other women to avoid unnecessary attention.
Siheyuan was intended as a housing solution for wealthy families, and some of them could even afford a two-story houzhaofang. All passages between the building were covered.
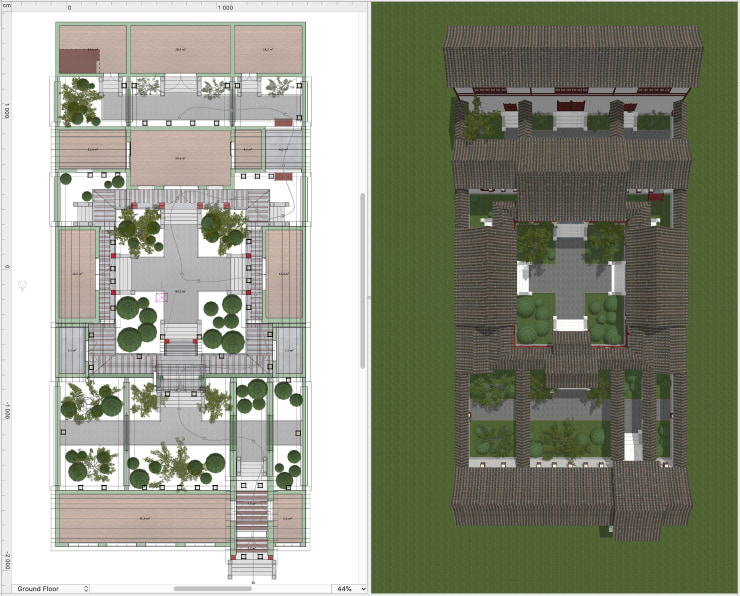
Siheyuan was built in compliance with many canons, but the structure of the house used to vary depending on the family's wealth. The most common type included one patio, but other types used to have two or more, up to as many as five patios. For instance, the characters in one of China’s Four Great Classical Novels, named Dream of the Red Chamber, used to live in a siheyuan with five patios.
Siheyuans used to be preserved for many eras. But, in modern times, most of the buildings were taken down for the sake of expanding the multi-story housing solutions in the cities. Nowadays, most of the remaining siheyuan houses are preserved as architectural monuments, and they are protected by the Chinese government.
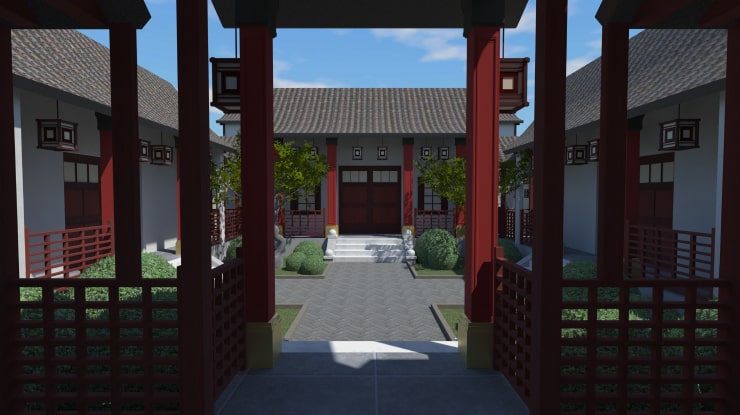
So, how do you create a traditional Chinese house in Live Home 3D? Despite the abundance of structures in such a project, creating a siheyuan in the program is quite an easy task.
Build the Walls
Let’s start with the basics, which is the building foundation, walls and roof. You can easily find the drawing of a siheyuan on the internet or simply rely on your own ideas. Use the Room tool and Straight Wall tool to create facilities and the Floor Poly tool to build a foundation for the future passages. Don’t forget about adjusting the necessary parameters in the Building properties of the Inspector to build a high foundation for your house.
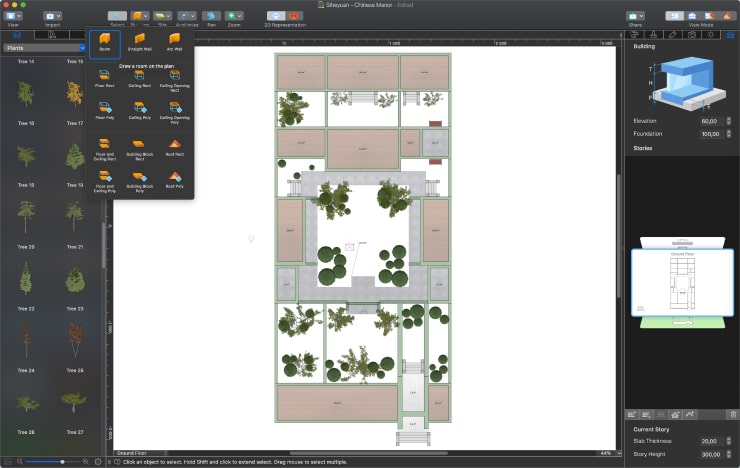
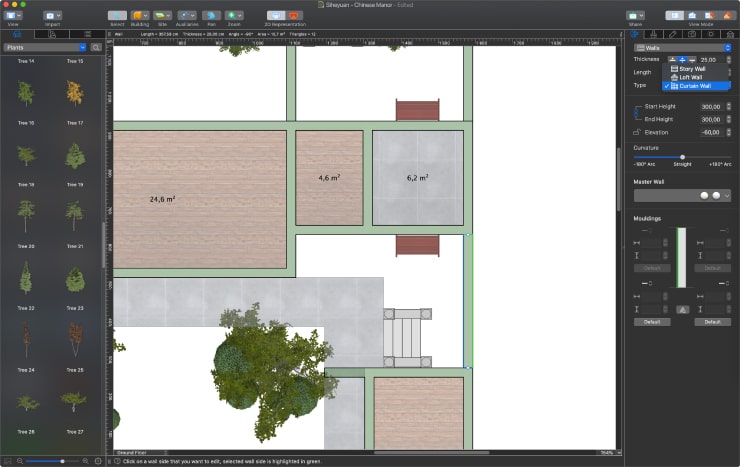
Pay attention to the wall type: in the Object properties of the Inspector, choose the Loft Wall type for the house walls and the Curtain Wall type for fences. This step is important for further work with roofs. The walls in our sample project are quite high as they are designed to protect the property from intruders.
Work With the Roof
The most recognizable part of Chinese architecture is the curved roof. Rectangular houses are topped by various types of tiled gable roofs with curved sides: xuanshan, yingshan or juanpeng. Flat roofing can also be found in some parts of China. Dougongs (斗拱), specific to the architecture of palaces and temples, are not present in residential buildings.
Add a Basic Roof for Passages and Fences
We have already covered the basic types of roofs in Live Home 3D. In our sample project for the traditional Chinese house, we used a slightly adjusted two-sided gable type roof.
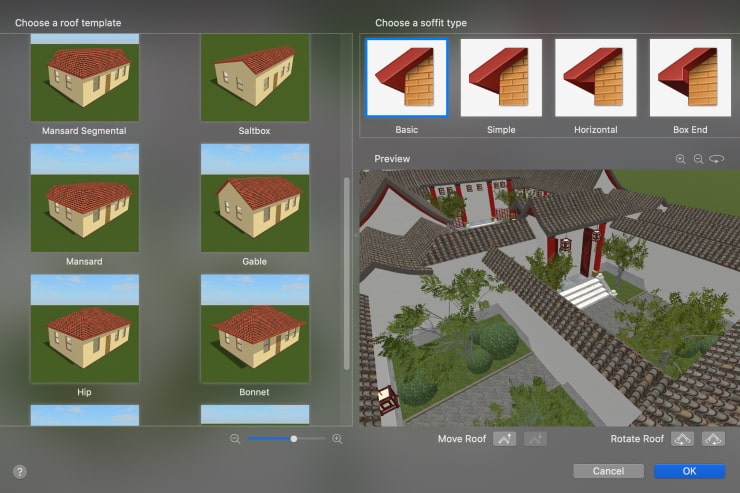
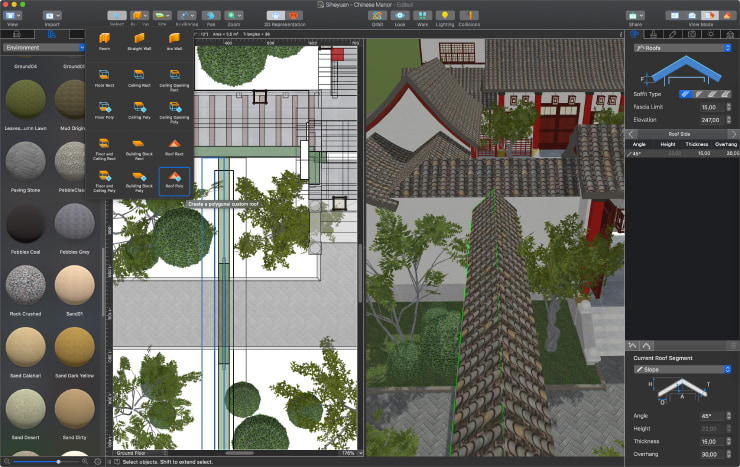
To cover the fences, use the Roof Rect tool, and set the 45º angle for the sides. The roofs above the passages can be added in a similar way, but use the Roof Poly tool to draw L-shaped and U-shaped roofs by one contour.
Tip: you don’t have to draw roofs from scratch and set the parameters every time. It’s enough to do this once and then copy the roof and paste it in the necessary place, just like you would do with any other object in Live Home 3D. The roof can also be rotated and resized using its control points.
Create a Curved Roof
Building a curved roof is just as easy. We will make such a roof above the main and inner gates, as well as above residential buildings and the storerooms.
Using the Roof Rect tool, draw the contour of the roof above the main house, for example. Right click on the contour on the 2D plan view and choose Make Roof Editable. Now select one of the sides and divide it into segments using the Add roof side below/above the selected command. Set the necessary angle for each segment. In our sample project, we divided the side into 6 segments and set angles starting from 45º for the upper segment and ending with 20º angle for the lower one, creating a 5º step-by-step deviation. Experiment with angles to get your best result!
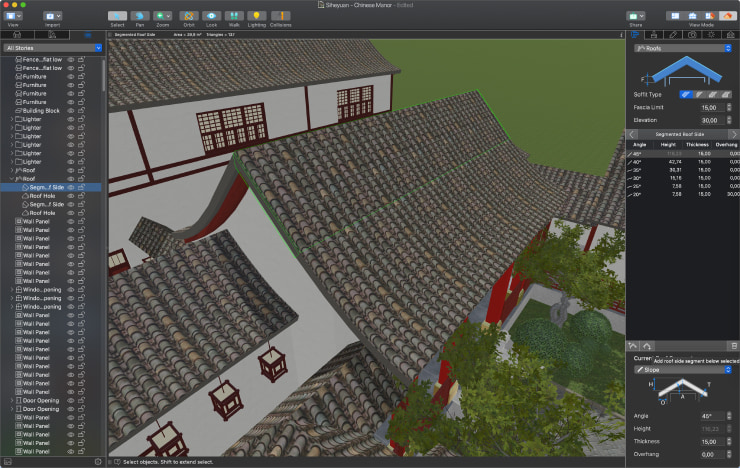
Create a Roof for the Rest of the Buildings
A similar roof can be built above the additional buildings and the rear house if you remove extra segments. Simply copy the roof and resize it accordingly.
In a slightly different way, you can build an asymmetrical roof above the outbuildings: one side of the roof is created with the help of the same method that was used for the roof of the main house, and the other side requires reducing the number of segments and setting different angles for them (4 segments with angles 55º-40º, e.g.., with a 5º step-by-step deviation are used in our sample project).
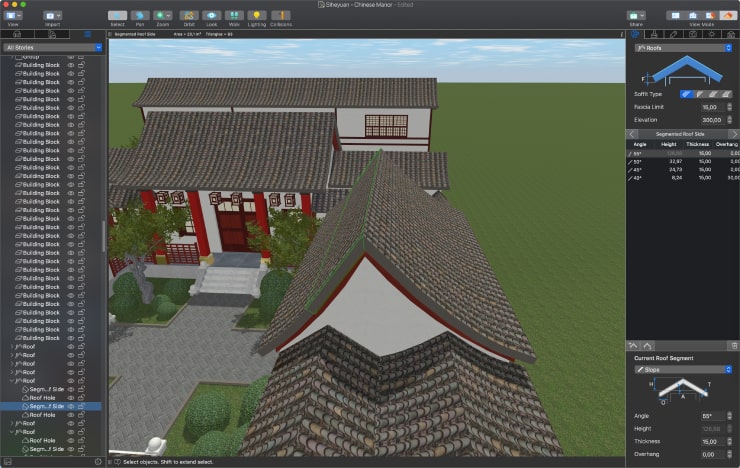
Don’t forget to add bearing pillars and columns in places where the roof hangs over the terrace and stairs. Fill in the space between the pillars and columns with decorative or functional railing and partitions.
Add Windows and Openings
It’s time to add windows and openings. Switch to the 2D Elevation View to draw openings in walls. The “moon-shaped” opening is created with the help of the Opening Poly tool. Using the Wall Panel Poly tool in the 2D Elevation View, you can add decorative panels. Choose and apply the material that contrasts with the walls. Sliding doors and double-leaf windows suitable for this type of project can be easily found in the built-in library of the app. Those who want to enrich their existing collection of doors, windows and gates can do this for free in the embedded store of Live Home 3D.
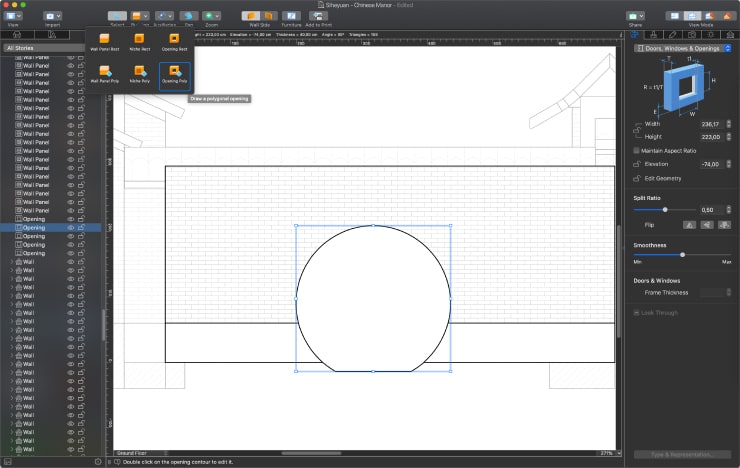
Add Decorative Elements and Other Objects
Now, all that’s left are the finishing touches. Add decorative panels that imitate the wooden bar along the facades: ceiling beams (built with the Building Block tool), plants and pathways, for example.
Create a Landscape
Starting with version 4.0, Live Home 3D offers its users the tools necessary for creating and editing the landscape. You can create a unique landscape for your siheyuan, add garden pathways and, of course, plants. The built-in Library contains a plethora of different trees, bushes and flowers. Furthermore, for users who would like to put a special emphasis on their garden, we have created an additional package that contains even more species of plants.
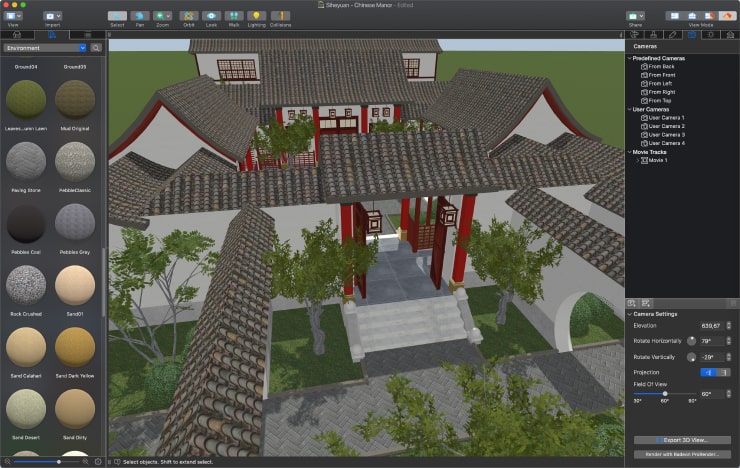
Customize Your Project
Remember that there are plenty of ways you can customize your project and make it more unique. For instance, Live Home 3D supports the import of your own 3D models in various formats: .skp, .3ds, .fbx, .cde, .obj and others.
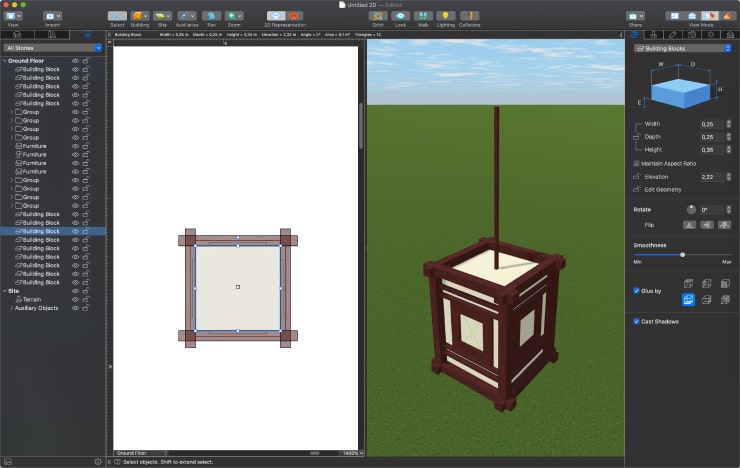
Alternatively, you can create the necessary object by yourself using the Building Block tool. This is the solution chosen for the lanterns in our sample project. Building Blocks of different sizes, positioned with various elevation parameters, are grouped together, and one of the objects is assigned as the light source in the light editor window. Right clicking on the object in the 2D plan view and choosing Edit Light Source will allow you to experiment with the direction, location, color and intensity of the light source.
Peculiarities of Traditional Chinese Interior Design
Unlike other countries in Asia, the Chinese interior abounds in high tables, chairs, beds and cupboards. The furniture is lavishly decorated, and dark wood materials are more common than lighter ones.
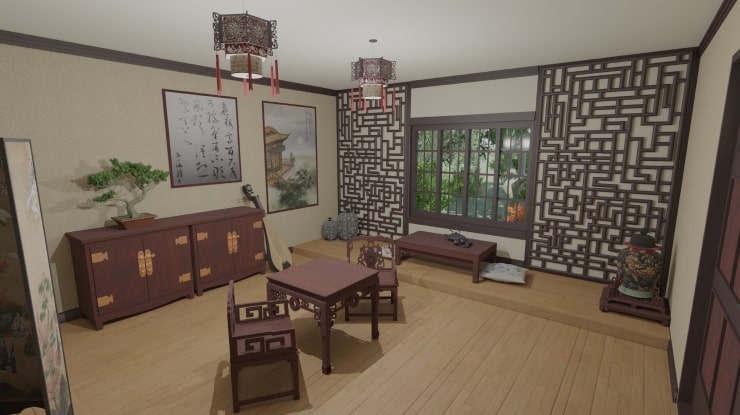
The traditional Chinese interior can be considered as the founder of the space-zoning concept in interior design. The large space of an elongated room was subdivided into sections with the help of lightweight curtains or room dividers, some of which were of a heavy carved type, and others were lightweight paper-based and painted. The dividers could also be folding or stationary.
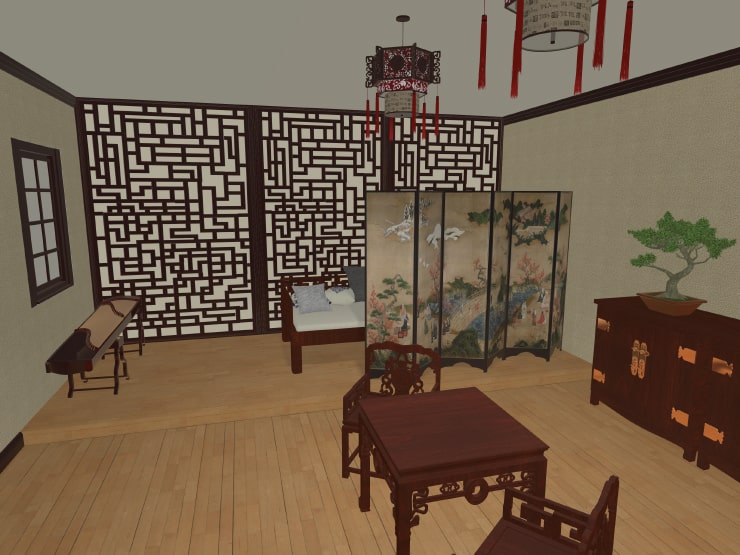
The walls of the room used to be light in color, covered with wallpapers, painted or framed with carved wooden panels. Large windows were usually either covered with lightweight bamboo blinds or not covered at all. The artificial lighting used to be dim and served a decorative purpose rather than functional. The traditional Chinese interior followed the principle of symmetry and duality of objects, and their form was graphically emphasized.
How to Get More Objects and Materials
We have already covered the features of the Material Editor in our previous article. You can also find the detailed description of this feature and its capabilities in the Help section on our website. Now let’s focus on other ways to enrich your material library. One such option is the Live Home 3D In-App Store that can be reached through the main menu. Besides materials and objects, you can get more samples of houses in different architectural styles in our 50 Houses Pack, available for purchase in the embedded store. The existing collections are constantly updated with new objects, materials and samples, so stay tuned.

Another option is importing custom materials and 3D models of your own or obtained from other sources. You can import 3D models to Live Home 3D in the following formats: Autodesk 3D Studio (created in the Autodesk® 3ds Max® software), Autodesk FBX, COLLADA, Wavefront OBJ, Sweet Home 3D, Google Earth KMZ, 3D Image (a regular graphic file will be imported, and a 3D Image object will be generated).
In addition to the above-mentioned formats, the Mac version offers import from the following formats: Trimble SketchUp™, Collada Zipped, Ogre XML.
Professional 3D Rendering
Now that you have finished the project, you can turn your design into a highly realistic image that looks just like a photo. Live Home 3D for Mac offers the ability to export stunningly realistic 3D views made with the Radeon™ ProRender. Users of the iPhone, iPad, Windows versions can use a third-party rendering software to achieve photorealistic results.
